
In many ways, less is more on a sailboat. While the old adage “many hands make light work” holds true for a well-oiled racing crew, on a cruising yacht, with too many people, it’s also possible to literally step on one another’s toes.
With a large, inexperienced crew, assigning jobs becomes tricky, people fall over each other on deck, and blame gets passed when a manoeuvre goes wrong. (A quick reminder: blame should never be passed to the crew—it always sits squarely with the skipper!)
With just the two of you on deck, coordinating tasks is straightforward—provided you share boat handling roles and build mutual confidence. There is less shouting, no getting names mixed up, and plenty of space on deck. However, because there are no extra crew members available to “fix” an error live on the go, thorough planning and preparation are non-negotiable.
Quick Summary: The Shorthanded Advantage
- Preparation Prevents Chain Reactions: 90% of maneuver failures in shorthanded sailing happen before the helm is even moved. Proper line routing and obstacle checks eliminate panic on deck.
- Less is More: Extra hands without clear roles create clutter; two coordinated sailors working a rehearsed plan will always outperform an uncoordinated crowd.
- The Autopilot is Your 3rd Crew Member: Knowing when to switch between Course Mode, Apparent Wind Mode, and True Wind Mode eliminates stress during sail changes, tacks, and gybes.
- Mechanics Over Muscle: Routing lines cleanly outside pushpits and letting the engine do the heavy lifting keeps boat handling effortless—even on a cruising boat like All Winds.
1. The Golden Rule: Preparation Prevents the “Chain Reaction”
Without extra hands on deck to fix live errors under load, a single preparation oversight triggers a rapid chain reaction. Small issues on deck quickly compound into a crisis.
The Foredeck Line Snag (Tacking & Gybing)
Many charter boats carry the inflated tender lashed down on the foredeck. If you initiate a tack without visual preparation, the working or lazy sheet can catch under the dinghy as it sweeps across. Even if the dinghy isn’t there, any mast steps or anything else that might be in the area can also be a snag risk for any foresail that goes past the mast. (Remember that all hatches should be closed at sea or they also become a snagging hazard)
- The Chain Reaction: A snagged sheet at this point may just lead to a heavily twisted lazy sheet which can be sorted out after the tack, or it may mean that the jib can not pass the mast effectively, heaving-to with a massive load on whatever the sheet is stuck on. This can lead to many risks either to person or vessel if not quickly dealt with.
- The Prep Fix: Before every tack, visually trace the sheet path from the bow to the cockpit. Ensure sheets are lifted clear of the dinghy before turning the helm. Having learned from experience! We ensure that the new sheet is already resting over the dinghy before we start the tack and that the current sheet is only released as the sail begins to luff anyway. This reduces the amount of time that a wild shaking movement on the clew can force the sheets to catch somewhere on the way across.
While getting used to All Winds, we were gybing down the coast of Italy in over 20 knots of wind at night. Just before dawn, the tails of the lazy bag ties jammed in the mainsheet block mid-gybe. As a result, we couldn’t sheet the main out as it crossed over. Luckily, we centered the helm at the exact right moment, preventing a broach. However, the delay left the jib untrimmed, causing a sheet to wrap around the foredeck dinghy and windsurf board.
Your immediate reaction might be to save the board. But gear is replaceable—safety comes first. We pointed straight downwind and put tension on the mainsheet using the winch with the clutch closed to protect our fingers. Once we cleared the straps and sheeted out the main, the boat stabilised. Under the shadow of the main, we cleared the foredeck lines safely. When a chain reaction happens, tackle issues in sequence. Priority always sits with crew safety and vessel stability over physical gear.
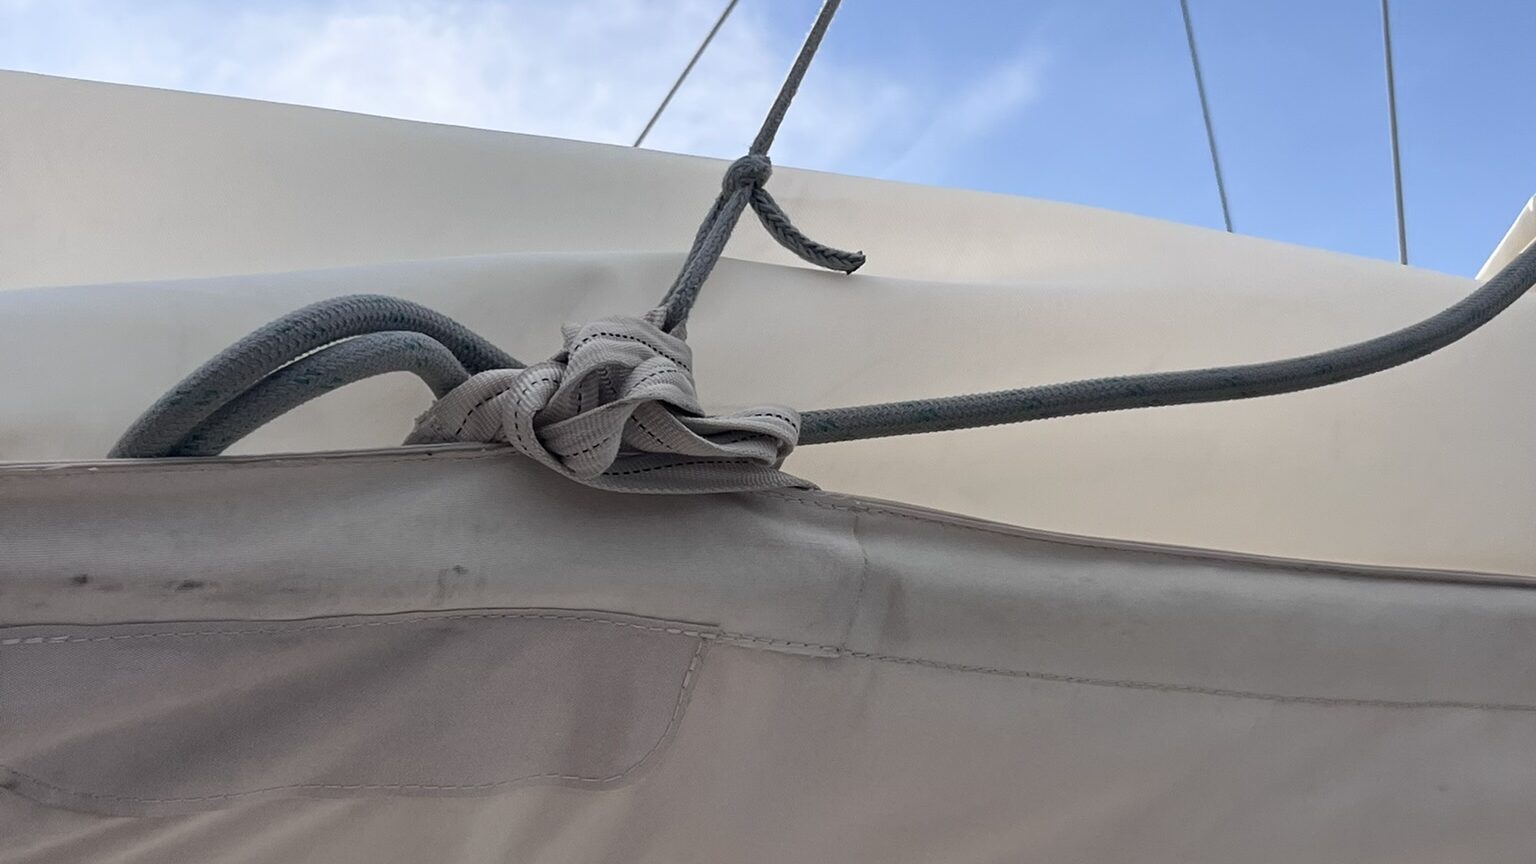
The Pushpit & Guardrail Problem (Docking)
When preparing mooring or stern lines on approach to the quay, line routing is everything. A common error is passing a stern line inside the stainless steel pushpit uprights or under the wrong lifeline wire.
- The Chain Reaction: You throw the line to the quay and try to engage forward gear to stabilise the boat against the stern line. Because the line was routed inside the pushpit, it binds against the stainless steel railing instead of pulling cleanly from the cleat. Any pressure on this line will damage the pushpit or the lifelines. You cannot motor against it to stabilise the boat, and suddenly even the best manoeuvre can go to pot.
- The Prep Fix: Always lead dock lines directly from the cleat, through the fairlead, and outside all pushpits, pulpits, and lifelines before making your approach. Prepare the lines so that they are both easy to throw and receive back or lasso a bollard or cleat with.
We often find docking as a couple much easier than working with an unfamiliar marinero. In Calvi, after an overnight passage from Sardinia, we entered the marina with 20 knots of wind on the beam. The quay used mooring rings. We briefed that getting the windward stern line made fast first was critical so we could motor against it and hold position in the wind shadow of the adjacent boat.
However, the marinero insisted on handing us the slime line first while holding our stern line by hand without a wrap. The wind immediately started blowing our bow off. I warned him I was engaging forward gear to maintain control. Once he realized he couldn’t hold 8 tons of yacht by hand, he got another wrap on the ring. I motored gently against the line, brought the boat back under control, and secured the berth.
2. The Autopilot as Your “Third Crew Member”
When sailing shorthanded, the autopilot is an invaluable asset. To eliminate stress during sail changes, tacks, and gybes, make sure you master your autopilot operating modes before you need them on deck:
- Course Mode: Locks onto a magnetic compass heading. Ideal for motoring or navigating straight channels. Be aware from your Navigation courses – this is heading, not Course Over Ground (COG)
- Wind Mode (Apparent Wind): Maintains a constant Apparent Wind Angle. This is your primary mode for sailing upwind or on a reach.
- Wind Mode (True Wind): Maintains your heading relative to the True Wind direction. Crucial for downwind sailing and gybing to prevent the boat from broaching or suffering an accidental gybe if the wind shifts. (The boat needs an accurate speed through the water from the paddlewheel log for this to work.)
- Tack & Gybe Functions: Many modern pilots feature automated tacking and gybing routines. Test these functions in open water so you know how fast the helm moves. (Ensure that the wind angles are properly calibrated)
3. Step-by-Step Shorthanded Workflows
Leaving the Berth
Leaving a dock requires a plan, not physical brawn.
- Assess Environmental Factors: Identify wind and current directions and how they will push the hull once the lines are released.
- Line Prep & Routing: Remove redundant lines first. Ensure remaining lines are on slip (doubled back to the boat) and lead cleanly outside guardwires and around cleats or through rings in such a way that they will run freely without snagging when released.
- Engine Stabilisation (Med Mooring): The helmsman engages slow forward gear against one or both stern lines and assesses the ability to hold the boat in position using the motor and remaining lines. This holds the boat completely stable in the slip while the bow crew walks forward, drops the mooring/slime lines, and watches them sink. When the helm is ready, it only requires a quick thumbs-up for the person on the bow to drop the lines, as the helm goes into neutral for a moment.
- Clear Signal: Once mooring lines are safely on the seabed away from the prop, the bow crew gives a clear thumbs-up, and the helm can engage gear as required to stabilise the boat.
- Slipping Lines: Stern lines are slipped from the boat and hauled aboard rapidly. Engage gear briefly for initial momentum, then pop into neutral.
- Motor Out: Neutral is a gear; once the boat is moving, use neutral as a gear. With the prop engaged and the boat moving, it will actually try to push the boat a little out of the turn. In neutral, you can pivot the boat around the keel (when going forward), and just engaging gear puts extra flow over the rudder for a split second helps tighten the turn. If the engine is already in gear, you don’t get this advantage; you actually push the boat further forward.
- Tidy Up: Tidy up the lines and fenders
Setting Sail
- Preparation: Open the sail bag, check halyards for wraps, and verify that sheets run freely through deck organisers. (For in-mast furling, maintain light tension on the outhaul/furling line during deployment). If the lazy bag has tie straps, make sure they are tidied up around the lazy lines so they can’t get caught in the mainsheet blocks when underway!
- Engage Autopilot: Motoring slowly ahead into the wind, set the pilot to Wind Mode at 0 degrees (but True and Apparent work for this). Verify visually that the bow is directly head-to-wind, as the calibration might be off on the windex. Motor only fast enough to maintain the boat head-to-wind and always keep a lookout at the same time.
- Hoisting: One person mans the cockpit winch while the second goes to the mast (if safe). The mast crew pulls the halyard down by hand while the cockpit crew takes up slack. As load increases, add winch wraps and winch home.
- Trim & Fall Off: The mast crew confirms luff tension with a thumbs-up. Dial the pilot down to course, ease the main, and trim.
Tacking
- Prep Check: Check that the lazy sheet is clear of foredeck obstructions (dinghy, hatches, mast steps). Load 1–2 turns on the new working winch.
- Initiate Turn: Warn the crew and initiate a smooth turn into the wind, maximising boat speed and turning angle. The helm completely releases the old sheet the moment the sail depowers. (A little multi-tasking is required 😉 )
- Tail the New Sheet: As the bow passes through the wind, the helm slows the rate of turn to allow the crew to get the foresail in by hand under zero load. If done correctly, minimum winching is required. If the sail isn’t fully trimmed, luff slightly to take the load off while winching.
Autotack: Many modern autopilots have an Autotack function. If you plan to use this, then prepare as above; the only difference is that the helm can focus completely on releasing the old sheet as the sail starts to luff. Press the tack button, release the old sheet completely as the boat luffs, and sheet the new sheet aggressively as the bow passes the wind.
Regardless of whether you steer or use Autotack, it is essential that the sail is released at the point when it starts to luff of its own accord and is sheeted in immediately after the boat passes head to wind. Releasing too early increases the risk of the sheets getting tangled; releasing too late risks going into a heave-to situation uncontrolled. Sheeting the new side in too early slows or stops the turn, and sheeting in too late increases the risk of the sheets snagging and means you have to winch more.
Gybing
- Prep Check: Ensure the deck is clear, the straps from the lazy bag (if any) are clear of the mainsheet blocks, and the Jib sheets are clear of any foredeck obstructions.
- Bear away to approximately 160° True Wind Angle, ensure you ease the main and the jib as you bear away. Switch autopilot to True Wind Mode*.
- Centre the Main: Dial down another 5° to stabilise. Sheet the mainsail hard into the centre. The stronger partner can haul the mainsheet in aggressively by hand to speed up the process.
- Execute & Release: Steer or dial down until the jib crosses over, followed by the boom. The instant the boom crosses, release the mainsheet rapidly to depower the rig, steer onto your new course, and trim.
Why it’s so important to ease the main and the jib.
The Main: A sheeted-in main creates strong weather helm and heeling, both of which force the bow upwind and increase broaching risk.
The Jib: Once the main is centred, the Jib is what helps keep the boat driving forward. If the jib is not trimmed properly, you lose more boat speed and increase the apparent wind as the boom comes across.
*For a full explanation on why it’s important to use True Wind Mode, see our article on getting the most out of your Autopilot.
4. Setting & Recovering Downwind Sails (Gennaker)
Sailing downwind with the proper sails set is exhilarating and gives you maximum passage efficiency. Setting a gennaker as a couple can be effortless when every line is pre-sorted, and you have a plan. It’s always exciting to power past boats which are theoretically larger and faster than you with the kite flying. All Winds easily makes 9 to 10 knots in 15 knots of true wind with an apparent wind of under 10 knots when flying the gennaker downwind.
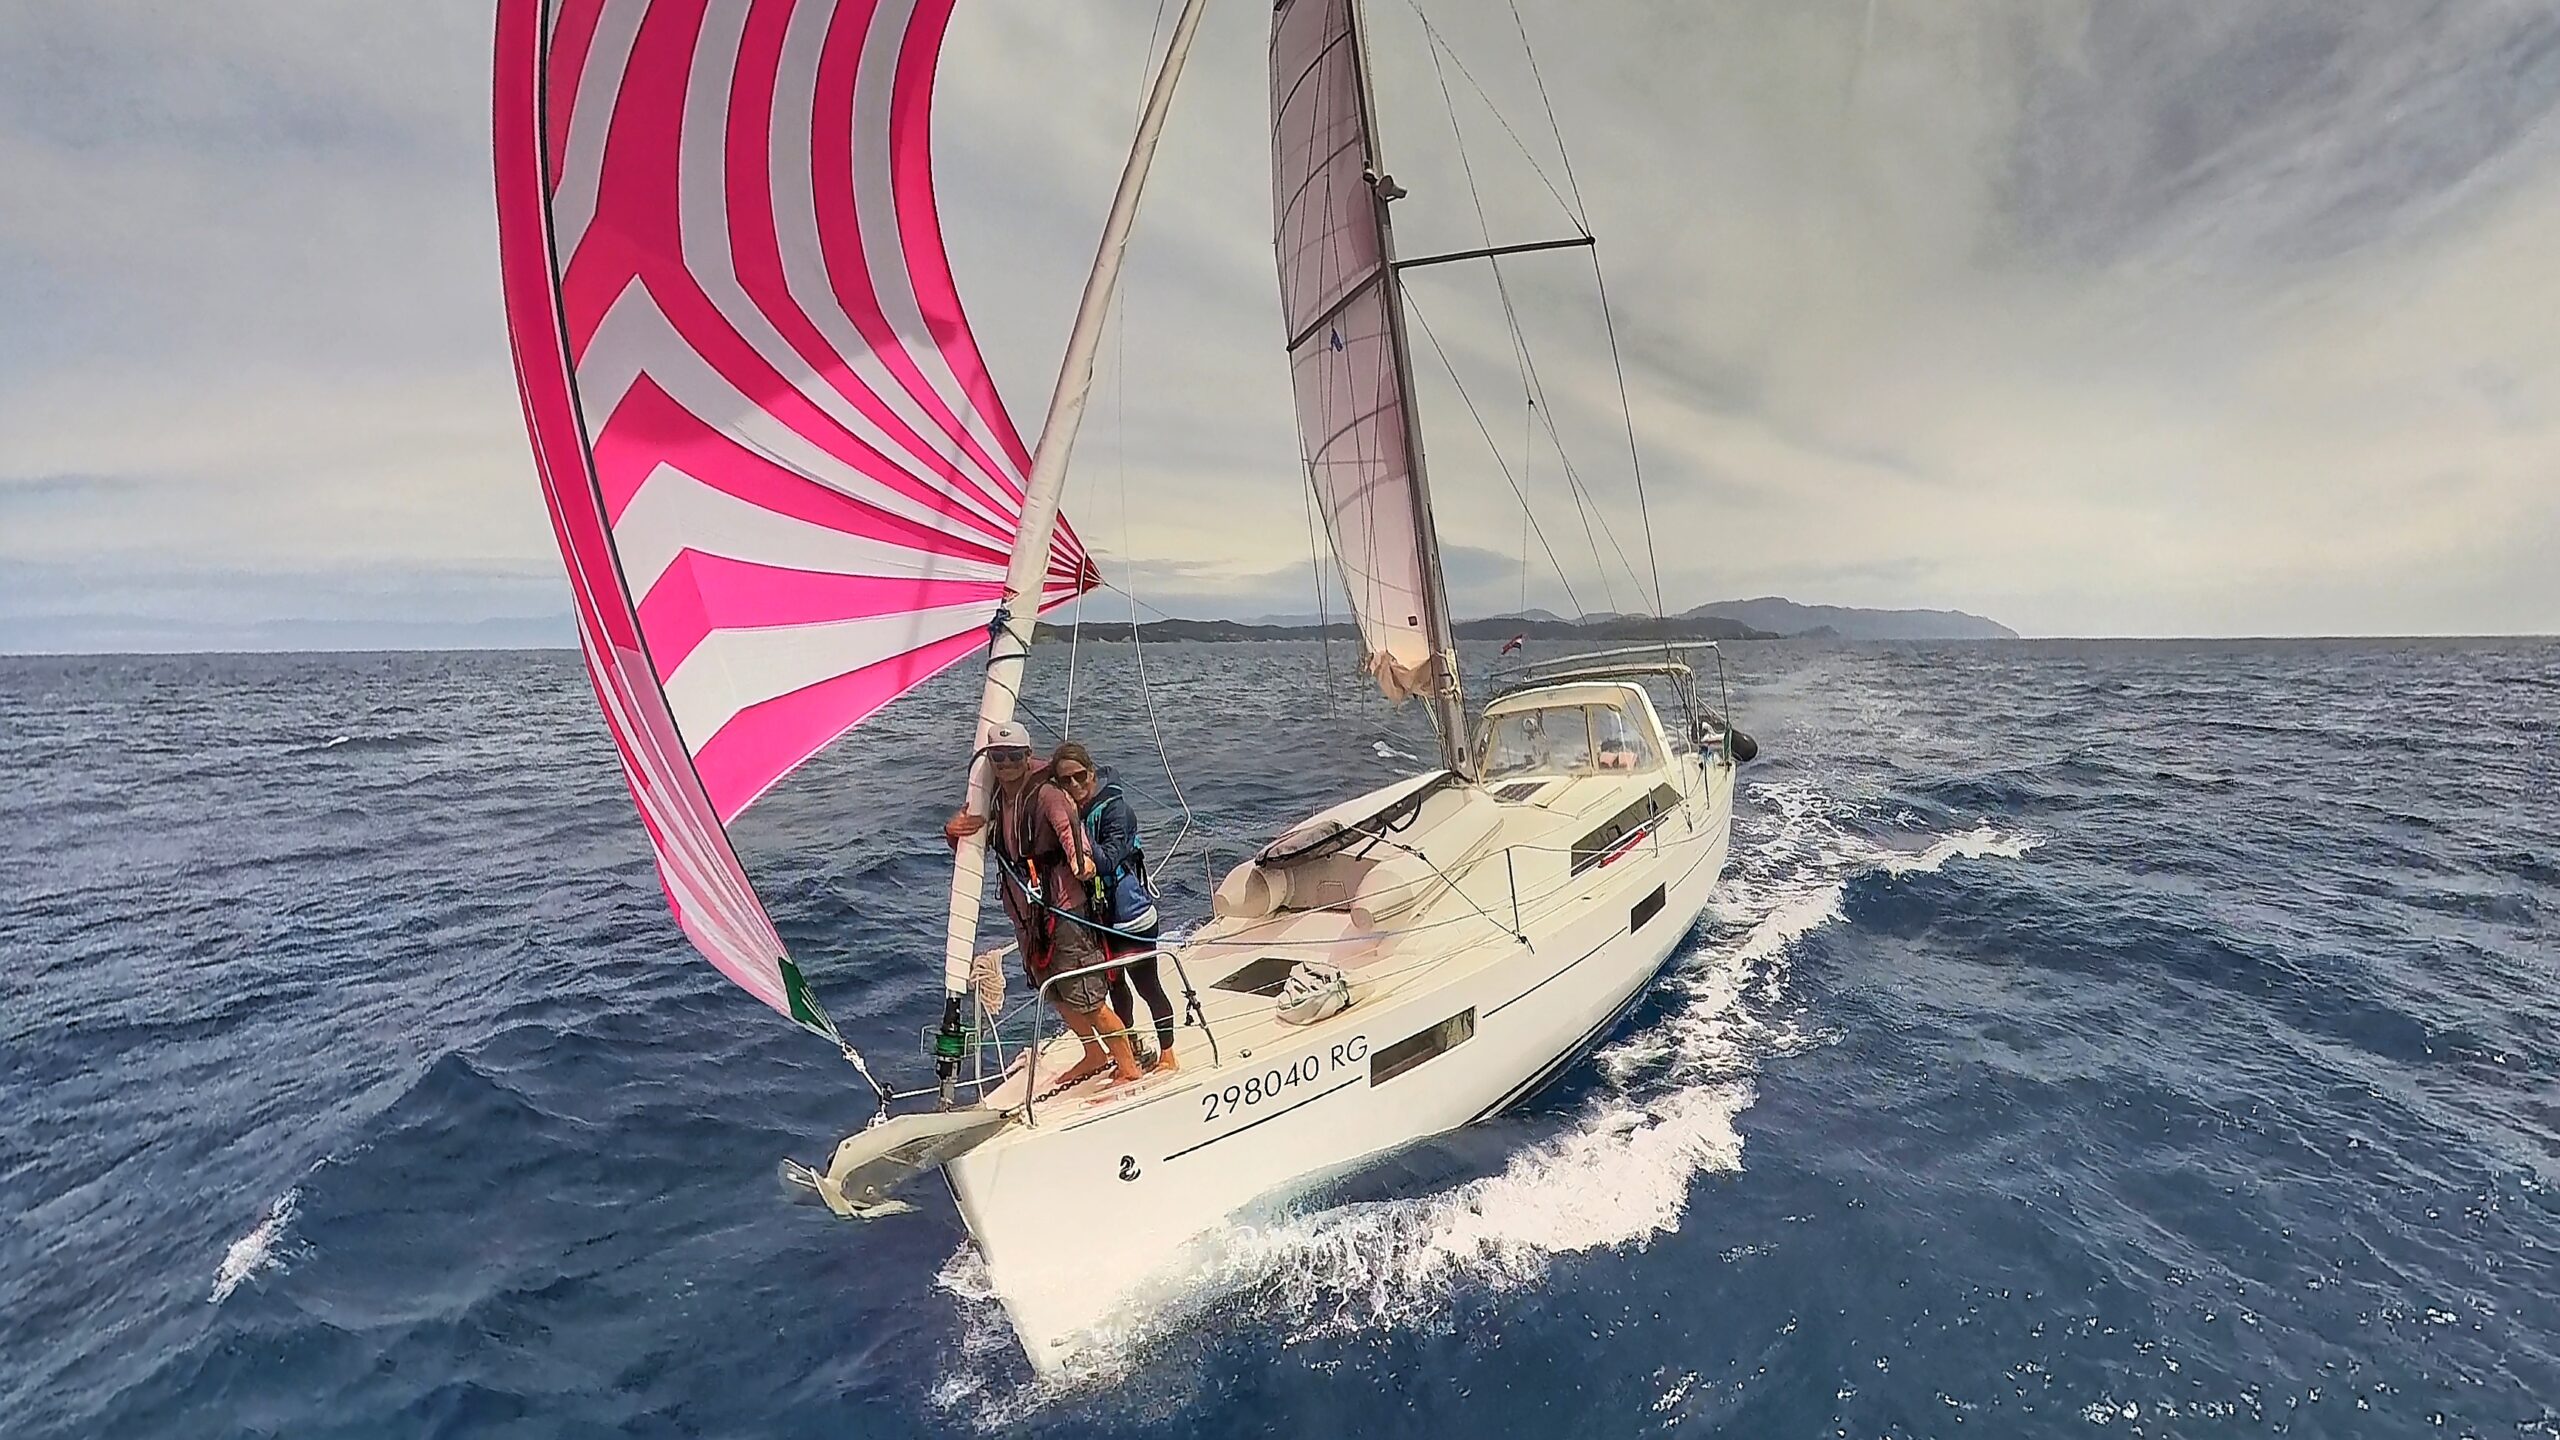
Setting the Gennaker
- Prep Check: Ensure you have sea room downwind, dial autopilot to approximately 155° True Wind Angle (TWA) and furl the jib.
- Deck Prep: Ensure everything is tidy, the sheets are in place and that nothing is going to snag.
- Sail Prep: One person goes forward (clipped on with a life jacket). Lay out the snuffer sock and identify the head, the clew and the luff. We have labelled them on our gennaker to make this quick and easy and also to help if an unfamiliar crew member is helping on the foredeck. Attach the sheets, ensuring they go around everything (if using a lazy sheet, it needs to go around the front of the forestay and have enough slack to come back past the mast. Ensure it does not go under the boat!). Verify that sheets, tack line, and halyards are completely free of wraps or twists and lead outside everything.
- Hoist the sock/snuffer: With the boat downwind, hoist the halyard to the top and cleat it. We find that it helps if one person pulls the halyard from the mast and the other takes up the slack on the cockpit winch.
- Raising the Snuffer: With the cockpit crew holding the loose active sheet with 2, 3 or 4 wraps on the winch (depending on wind strength), the foredeck crew pulls the line to raise the snuffer sock. The cockpit crew gently sheets in as the sock rises. At this point, some feeling is required by the cockpit crew: sheet too hard and stall the gennaker so it won’t inflate; sheet too little and it will luff. So sheet in and out to try to keep the sail inflated as the snuffer rises.
- Secure Lines: Sheet home until the sail fills. Separate and tie off the uphaul and downhaul lines clearly so you know exactly which line to grab if you need to douse quickly.
It’s best to practice in light winds to limit the consequences if something goes wrong when you are trying to come to terms with the extra sail area and handling.
Recovering the Gennaker
- Prep Check: Come to approximately 155° TWA so the mainsail blankets the gennaker.
- Depower: Foredeck crew goes forward clipped on. Signals the cockpit crew to ease the sheet and completely depower the sail.
- Snuff: Pull the snuffer line down hard and fast. (Tip: Lead the snuffer line through a snatch block on a bow cleat to pull upwards rather than downwards when dousing the snuffer. This means if it suddenly fills, you don’t get pulled off your feet but down to the deck!).
- Pack: Drop the halyard, secure the sail on deck, and ensure all lines are out of the water before starting the engine.
Tip: Always keep your Apparent Wind Angle (AWA) well aft of 90° (behind the beam) when hoisting or dousing the gennaker sock. Keeping the wind behind you prevents the sail, snuffer, or halyard from blowing back into the rig and snagging on spreaders, steaming lights, or radar domes—ask us how we know! 😉
To avoid similar snags, avoid clipping an idle gennaker halyard at the mast base when not in use. Instead, lead it out to the bowsprit or secure it down to a side chainplate to keep it completely clear of the mast.
Emergency Gennaker Drop
If a snuffer jams, stay calm. Bear away to 155° TWA so the mainsail blankets the gennaker and depowers the rig. Next, completely release (blow) the tack line. Gather the sail by hand from the clew directly into the cockpit, sail bag, or open foredeck hatch. Finally, ease the halyard slowly as you stuff the sail below deck, ensuring it cannot re-inflate. On a shorthanded cruising boat, saving the crew and boat takes priority over saving the sail material.
Gennaker Gybing
We are purposely not covering Gennaker Gybing here; you should be completely comfortable with setting, recovering and dealing with emergencies before trying to gybe a gennaker with a snuffer on a cruising boat. In many cases, the sheets need to be set for an outside gybe, which leads to an increased possibility of sailing over the sheets or the raised snuffer catching at the top of the mast. Therefore, it’s best you gain experience before attempting to gybe.
5. Stress-Free Mediterranean Docking
As mentioned previously, we often prefer docking with just the two of us rather than relying on an unknown marineros help. Again, to make this work, it comes down to planning and preparation.
- Pre-Docking Prep: Rig fenders to the correct height. Lead stern lines through fairleads and outside all pushpit railings. Conduct a slow drive-by to check wind and space.
- Securing the Stern: Reverse in square. Lasso or attach the windward stern line to the quay cleat. (It’s always good for all crew members to practice lassoing in advance!)
- Engine Power vs. Muscle: Once at least one stern line is fixed, engage slow forward gear against the stern line. Balance the engine power (and rudder if a single rudder boat) to keep the boat stable. If there is time, get the second stern line on or sit with fenders against a neighbouring boat. (At this point you are secure and still have an option to escape if you want. Once the slime line is raised, your escape options shrink!
- Slime Line Safety Check: With the boat secured on one or two stern lines, pop the engine into neutral before the bow crew picks up the lazy/slime line to eliminate prop-wrap risks. Ensure the boat is in neutral when the slime line is raised and when it is pulled past the prop when walking forward.
- Securing the Bow: Walk the line forward. Once the slime line is at the bow, let the boat slide slightly forward on the stern lines. This means the bow crew does not have to break their back to pull the slime/lazy line tight. They can just fix it with a cleat hitch or OXO (whichever they are more comfortable with). Now the boat is secure, and the motor can stay in neutral for the second line.
- Final Adjustments: Once both bow lines have been cleated, reverse against the bow lines to set them, tension your stern lines, shut down, and enjoy a well-earned drink!
Which Stern Line First?
The internet wisdom is always the windward stern line first, and all things being equal, there is some truth to this… But there is no hard and fast rule, and sometimes it might be better to take the leeward line first and sometimes (wind on bow or stern) there may not be an obvious windward or leeward line.
In strong cross winds or if the wind is on side onto the bow and you have a boat on your leeward side, it might actually be a lot safer to use the leeward line first. (I immediately hear the internet gatekeepers preparing to lynch me for this hedonistic suggestion – but hear me out) If the wind is very strong from the beam and/or bow, you will struggle to hold the boat against the wind with the motor and at the same time you are increasing your risk of a prop wrap. Furthermore, if things do go pear-shaped, you now blow uncontrolled into the leeward boat, anyway risking more damage if you go uncontrolled. Whereas – if you go leeward line first, the line goes on, you gently motor ahead, and you softly come against the neighbouring boat (assuming both boats are properly fendered at the correct height!) Now you are stable; there is no losing control and getting blown against it, and you have the possibility to pull the windward slime/lazy line up with the motor briefly in neutral. The opposite way you always risk either getting blown or motoring over the slime line. Once you have one slime line on the boat is secure, and you can worry about the second one with all the time in the world and the motor in neutral.
Cross Wind Reality
Everyone talks about the nightmare of medmooring with a cross wind… and yes, there are videos online of it going pear-shaped. I’d wager though that a lot of these manoeuvres already went pear-shaped in the planning stage. Remember, 20 knots at the top of the mast is very likely not 20 knots at water level. In the fairway, you are protected by surrounding boats, which act as wind breaks, which help you when doing a crosswind manoeuvre. Arguably, the crosswind manoeuvre is not the difficult one; it’s the one where your bow is pointing straight into the wind, and conversely the one with your stern into the wind is relatively speaking quite easy.
Still Nervous?
Most marinas have a dinghy; if you are struggling or worried, then radio in advance and ask for dinghy assistance. It takes the stress off, and with less stress there is a better chance of doing a good manoeuvre.
Ready to Master Shorthanded Seamanship?
Join us in Croatia for a custom Seamanship & Coaching Week, where we teach real-world mechanics, line handling, and stress-free boat control. Contact All Winds Adventures today to design your custom week on the water.
Yes, absolutely. Modern cruising yachts like the Beneteau Oceanis 41.1 are designed with lines led back to the cockpit and powerful autopilots. Success comes down to mechanical preparation, clear communication, and working in sequence rather than relying on physical muscle.
While taking the windward line first is standard practice, taking the leeward line first can be significantly safer in strong crosswinds if you have a properly fendered neighbouring boat to leeward. Resting gently against a fendered vessel under low engine power maintains total control and prevents the boat from blowing off while securing lines.
You should always switch your autopilot to True Wind Mode (TWA) when sailing downwind or executing a gybe. Unlike Course Mode or Apparent Wind Mode, True Wind Mode prevents the boat from accidentally rounding up or broaching if a sudden wind shift occurs during the manoeuvre.
If the snuffer jams, do not panic. Bear away to 155° True Wind Angle to blanket the gennaker behind the mainsail. If it still will not douse, execute an emergency drop by releasing (blowing) the tack line completely, gathering the sail in from the clew into the cockpit or foredeck hatch under the shadow of the main, and then dropping the halyard.
Shorthanded MOB recovery requires complete role interchangeability—both partners must be able to start the engine, drop or furl sails, make a Mayday call, and manoeuvre the yacht alone. On All Winds, we both wear lifejackets equipped with personal distress beacons (a PLB/AIS for Dave and an MOB/AIS for Karin). If either of us goes overboard, the device automatically triggers an alarm and paints an exact AIS target on our chartplotter so the remaining sailor can track the casualty’s position.
When sailing shorthanded, three immediate actions are critical:
Stop the boat instantly: Execute a Quick-Stop (tack without releasing the jib sheet) so the boat stays hove-to right next to the casualty rather than sailing away.
Send a Mayday early: Send a DSC Distress alert and Mayday on VHF Ch 16 immediately—rescue services would far rather be called and stood down than notified 30 minutes too late.
Practice in advance: Work through engine starting, sail dumping, and winching workflows together before setting off on long passages.
(Read our complete guide on PLB & MOB AIS Beacons for Cruising Couples to see how we set up our lifejackets.)

No responses yet